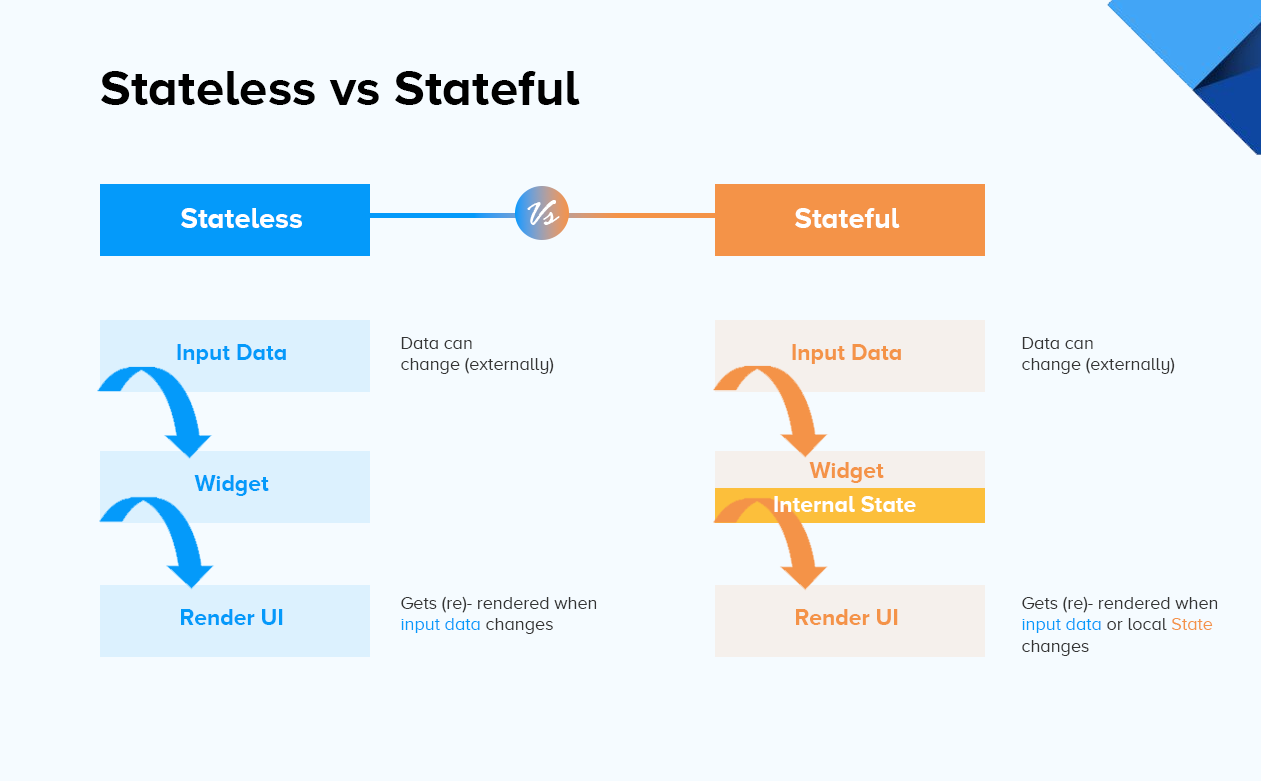
In Flutter, widgets form the building blocks of any application. Understanding how to use them effectively is key to developing efficient, maintainable, and performant apps. Among these widgets, two primary types—Stateless and Stateful—stand out for their distinct roles in handling app behavior. In this blog, we’ll delve into the nuances of these widget types, helping you make informed decisions when building your Flutter app.
What Are Widgets in Flutter?
Widgets in Flutter are immutable objects that describe a part of the user interface (UI). Everything you see on the screen, from a button to an entire page, is a widget. These widgets are categorized into Stateless and Stateful, each serving specific purposes.
Flutter app development: Understanding Stateless Widgets
A StatelessWidget is a widget that doesn’t change its state over time. Once created, its configuration remains fixed. Stateless widgets are ideal for static content where the UI doesn’t need to respond dynamically to user interactions or other changes.
When to Use Stateless Widgets
-
Displaying static text, images, or icons.
-
Creating layouts that don’t require updates based on user interactions.
-
Designing reusable components that don’t need to manage internal state.
Example of a Stateless Widget
In this example, the widget remains static, displaying a simple message without reacting to any changes.
import 'package:flutter/material.dart';

class MyStatelessWidget extends StatelessWidget {
  @override
  Widget build(BuildContext context) {
    return Scaffold(
      appBar: AppBar(
        title: Text('Stateless Widget Example'),
      ),
      body: Center(
        child: Text('This is a Stateless Widget'),
      ),
    );
  }
}
In this example, the widget remains static, displaying a simple message without reacting to any changes.
Understanding Stateful Widgets on the flutter app development
A StatefulWidget, on the other hand, can change its state during its lifetime. It’s suitable for dynamic content that needs to respond to user interactions, animations, or other runtime events.
When to Use Stateful Widgets
- Handling user inputs, such as form fields or buttons.
- Managing animations and interactive UI elements.
- Updating the UI based on network requests or other external data changes.
Example of a Stateful Widget
import 'package:flutter/material.dart';

class MyStatefulWidget extends StatefulWidget {
  @override
  _MyStatefulWidgetState createState() => _MyStatefulWidgetState();
}

class _MyStatefulWidgetState extends State {
  int _counter = 0;

  void _incrementCounter() {
    setState(() {
      _counter++;
    });
  }

  @override
  Widget build(BuildContext context) {
    return Scaffold(
      appBar: AppBar(
        title: Text('Stateful Widget Example'),
      ),
      body: Center(
        child: Column(
          mainAxisAlignment: MainAxisAlignment.center,
          children: [
            Text('You have pressed the button this many times:'),
            Text(
              '$_counter',
              style: Theme.of(context).textTheme.headline4,
            ),
          ],
        ),
      ),
      floatingActionButton: FloatingActionButton(
        onPressed: _incrementCounter,
        tooltip: 'Increment',
        child: Icon(Icons.add),
      ),
    );
  }
}
Here, the _counter variable’s value updates dynamically as the user presses the button, and the UI reflects the change.
Key Differences Between Stateless and Stateful Widgets

Best Practices for Using Widgets Wisely
- Keep It Simple: Use StatelessWidget whenever possible to reduce complexity and improve performance.
- Minimize State: Limit the amount of state in StatefulWidget and lift the state to parent widgets when multiple children depend on it.
- Use Keys Appropriately: When switching between widgets, use unique keys to preserve state and improve rendering efficiency.
- Separate Logic and UI: Keep business logic out of widgets using state management solutions like Provider, Riverpod, or Bloc.
- Reuse Components: Design reusable widgets to maintain a clean codebase and reduce redundancy.
Conclusion
Choosing between Stateless and Stateful widgets depends on your app’s specific requirements. By understanding their roles and characteristics, you can build apps that are not only functional but also optimized for performance and maintainability. Keep these tips in mind as you design your next Flutter app, and you’ll be on the path to creating seamless user experiences.

